介绍
当。。。的时候 LED显示屏 arrives, installation is only the first step in its application, and the debugging link is also crucial. A carefully debugged LED display can not only ensure clear images, bright colors, and stable operation but also effectively extend the service life and reduce maintenance costs.
So, how do you debug after installing the LED display? Don’t worry; this article will tell you in detail how to do it.
Step 1: What are the preparations before debugging the LED display?
Are you waiting for you to finally install the LED display? Are you eager to see it shine? Don’t worry, don’t worry; the preparations before debugging are the key. We have to do it step by step to ensure that there is nothing wrong.
First of all, you have to observe whether the LED display is installed in the right place. Imagine that you are standing from the perspective of the audience and see if the screen is facing you. The height and angle are just right so that you won’t look up and your neck hurts, nor will you look down and your eyes are sore.
Also, don’t forget to check the surrounding environment so that the sun will not shine directly on the screen, making it look like a mirror, and you can’t see anything clearly. Oh, by the way, safety comes first. You have to make sure that the screen is stable and will not fall apart when a gust of wind blows.
Next, we have to give the LED display a “full body check.” Just like when you buy a new piece of clothing, you always have to check if there are any threads or holes, right? The same is true for the display.
You have to carefully check if there are any cracks or scratches and whether the connecting wires and power cords are intact, without any exposed or damaged areas. In addition, the small accessories that come with the screen, such as the remote control, control card, etc., must be checked one by one to ensure that none are missing or broken.
Finally, we have to prepare some “debugging artifacts.” Imagine that you hold the remote control in your hand, just like holding a magic wand, and the screen lights up with a light press. Isn’t that a great feeling?
So, you have to make sure that the remote control or control software is a “perfect match” with your display and is easy to use. In addition, tools such as test signal sources and multimeters must also be prepared.
In case you encounter any problems during the debugging process, these tools are your “rescuers” and can help you quickly locate and solve the problems.
In short, the preparations before debugging are like a “warm-up exercise.” Although it looks a bit cumbersome, it is all to ensure that your LED display can be presented to everyone in the best condition.
So, don’t rush; take your time and make these preparations step by step. I believe that your display will definitely bring you unexpected surprises!
Step 2: Check the hardware connection of the LED display
Now that we have done a preliminary “physical examination” of the LED display, the next step is to do a “full body scan” of its hardware connection. This step is the key to whether the display can work properly, so we have to be very alert!
First, we have to carefully observe the power cords and signal cables. They are like the “lifeline” of the LED display. We must ensure that they are connected correctly and firmly without any damage.
You have to check one by one to see if the connectors are all plugged in tightly and not loose and whether the wires are intact, without any damage or exposed areas. If you find that there is a problem with any wire, replace it with a new one immediately. Don’t hesitate!
Next, we have to check the connection between the LED display and the bracket. You have to make sure that they are firmly connected without any shaking.
If you find that the connection is not tight, quickly find a tool to tighten it, and don’t let it become a “shaky” or “dangerous item.” In addition, the base must be adjusted and stabilized, and the screws must be tightened to ensure that the display can stand there steadily and will not “sway in the wind.”
During the inspection process, you have to be like a detective and not miss any details. Because it is often those seemingly insignificant details that may cause big problems. So, we have to be patient and careful to ensure that every connection is foolproof.
After completing these checks, your LED display is one step closer to successfully lighting up. Next, we can enter the debugging stage and make your display shine! However, before debugging, don’t forget to check again to make sure everything is ready so as to avoid any unexpected situations that affect your mood.
Step 3: Preliminary debugging of LED display
After the previous hardware connection check, our LED display is ready to go. Next is the exciting preliminary debugging link, and we want to make it officially “light up”!
First, you have to carefully connect the power supply of the LED display. At this time, just like injecting vitality into the LED display, you have to carefully observe the power indicator to see if it lights up obediently.
If the indicator light is not on or flickers, there may be a problem with the power connection. You have to quickly check the power cord, power switch, and power socket to make sure everything is normal.
Next, it’s time to start the LED display. You can pick up the remote control or open the control software on the computer, just like controlling a magical switch. With a light press, the display should light up.
If the display does not respond, don’t worry. First, check whether the remote control or control software matches the display, whether the battery is dead, or whether the control software needs to be updated.
After the display starts, you can start the system settings. This is like customizing a set of exclusive “clothes” for the display to make it more in line with your usage habits.
You can set the language so that the display shows the language you are familiar with, set the time so that the display synchronizes with you, and set the signal source, such as selecting HDMI, VGA, or network signals, so that the display can receive and display what you want.
In the process of setting up, you have to be like a careful gardener, slowly adjusting until you find the settings that suit you best. Don’t forget that each display may have some small differences, so you have to adjust according to the actual situation, don’t blindly copy other people’s settings.
After the initial debugging is completed, your LED display is basically ready. Next, it is a more in-depth display effect debugging and functional testing. But don’t forget to make sure that the power connection is correct and the LED display is stable before each debugging so as to ensure smooth debugging and extend the service life of the display!
Step 4: Display effect debugging of LED display
After the initial debugging, our LED display was successfully lit, but don’t worry; we still have to “make up” it to make its display effect even better!
First, we have to adjust the key parameters such as 亮度, contrast, and chromaticity. Brightness is like the light you use to read a book. Too dark hurts your eyes, too bright and dazzling.
It has to be adjusted to just right to make your eyes comfortable. Contrast is like the contrast of light and dark in a painting. The bright ones have to be brighter, and the dark ones have to be darker so that the picture has a sense of hierarchy.
Chromaticity is the accuracy of color. The color displayed on the display must be the same as the real world, not reddish or blueish.
How do I adjust it? You can try it slowly through the remote control or control software and adjust it little by little until you find the “golden ratio” that makes your eyes light up. Don’t forget that different environments and different contents may require different settings, so you have to respond flexibly.
After adjusting the parameters, we have to send a test signal to test it. You can find some high-definition videos and gorgeous pictures to play and see how the display effect is. Is the picture as clear as the real thing?
Is the color bright enough to make people shine? Also, is it smooth and stable when playing, without any freezes or flickers?
If you find something wrong, don’t worry; let’s go back and adjust the parameters or check if there is a problem with the connection cable or signal source. Just like painting, you have to modify it over and over again to draw a satisfactory work.
LED display effect, debugging is a technical job that depends on your patience and carefulness. But as long as you are willing to spend time, I believe your LED display will definitely present a visual effect that will amaze you! Next, we can enter the functional test link to see what other hidden skills this display has!
Step 5: Functional test of LED display screen
After the display effect debugging, our LED display screen has been completely renewed, and the picture is so clear that it makes people’s eyes shine. But don’t worry.
We still have to give it a “comprehensive physical examination” to test its various functions to ensure that it is not only beautiful to look at but also easy to use!
First, we have to test the function of switching signal sources. Imagine that you are watching an exciting game and suddenly want to switch to a movie channel. At this time, you have to rely on this function.
You have to try switching from HDMI to VGA and then from VGA to network signal to see if the switching process is smooth and unobstructed and whether the picture switches instantly without freezing or black screen.
Next, the test of the playback mode is adjusted. Some LED displays support multiple playback modes, such as loop playback, single display, list playback, etc. You have to try these modes one by one to see if they can all work properly and whether they are convenient and quick to switch.
Especially for the loop playback mode, you have to make sure that it can automatically play in the order and time interval you set so as not to mess it up at that time.
During the test, you have to be like a rigorous scientist, carefully observe every reaction of the display, listen for any abnormal sounds, and see if there are any abnormal flickers or freezes. Once a problem is found, you have to record it quickly, then go back and check whether it is a setting problem or a hardware failure, and fix it in time.
Functional testing is a delicate job that depends on your patience and carefulness. But as long as you are willing to spend time, I believe your LED display will definitely pass this “big test,” proving that it is not only beautiful to look at but also versatile and stable to use! Next, we can use it with confidence and enjoy the visual feast it brings!
Step 6: Stability test of LED display
After the previous functional test, our LED display has shown its omnipotent nature. But don’t worry; we still have to give it a “protracted-war” test to see if it can still remain stable and durable under long-term operation and different environmental conditions.
First, we have to do a long-term continuous operation test. Just like running a marathon, we have to see if the LED display can hold on to the end. You can let it play videos, pictures, or dynamic effects continuously for several hours or even days to observe its performance.
In this process, you have to be like a careful guardian, always paying attention to the status of the display screen to see if there are any abnormal conditions such as freezing, flickering, or black screen.
It is particularly important to note that we have to test the LED display screen in a “harsh environment”. For example, in a high-temperature environment, you can put the display screen in a room with a higher temperature or use it to play a high-temperature video for a period of time to see if it can withstand it.
There is also a high-humidity environment; you can simulate rain or humid weather to observe the waterproof and moisture-proof performance of the display screen. Although these tests are a bit “cruel,” only in this way can we ensure that the display screen can remain stable and durable in real use, no matter what environment it encounters.
During the stability test, you have to keep good records and record the situation of each test in detail.
If you find a problem, you have to quickly analyze the cause and find a solution. It may be a hardware problem, such as a component aging; it may also be a software problem, such as the control program needs to be optimized.
No matter what the problem is, it must be repaired in time to ensure the perfect state of the display screen.
Stability testing is a long process that depends on your patience and persistence. But as long as you are willing to spend time, I believe your LED display will definitely pass this “big challenge” and prove that it is not only versatile but also durable and reliable! In this way, you can use it with confidence and enjoy the long-lasting visual feast it brings!
Step 7: Troubleshooting and solving LED display screens
After the previous stability test, our LED display screen proved to be strong. But in actual use, it is inevitable to encounter some episodes, such as a sudden black screen, flickering, or abnormal display.
At this time, we have to become “fault detectives,” troubleshoot the problem step by step, find out the truth, and solve it!
First of all, when you find that the LED display screen is abnormal, don’t panic. We have to analyze it calmly.
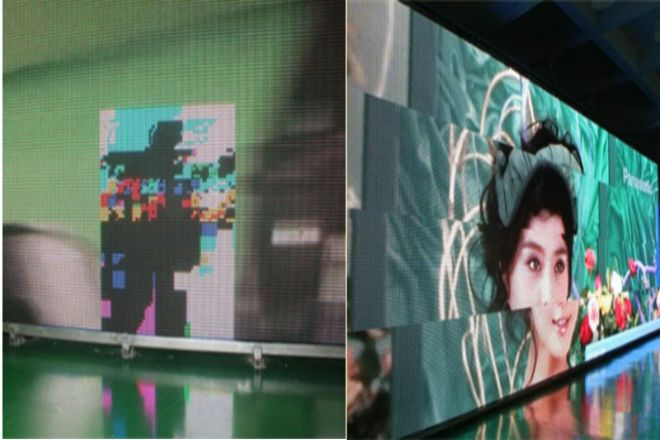
Observe the fault phenomenon, such as black screen, flickering, or color distortion, which can provide us with clues. Then, based on these clues, we can preliminarily judge where the problem may be.
Next, it is to check the hardware connection. You have to check whether the power cords and signal cables are firmly connected without looseness or damage. The connection between the display screen and the bracket and base must also be ensured to be stable and reliable. Don’t forget that sometimes the problem may be hidden in these seemingly insignificant details.
If there is no problem with the hardware connection, then we have to go deep into the system settings.
Check whether the parameters such as brightness, contrast, and chromaticity are set properly and whether the signal source selection is correct. There are also playback modes and loop settings, which must be checked one by one to ensure that there are no errors.
In the process of troubleshooting, you can use some tools to help, such as multimeters, signal generators, etc. They are like your “right-hand man” and can help you locate the problem faster. Of course, if you have a deep understanding of the structure and working principle of the display, it will be more handy to troubleshoot.
Once the problem is found, we have to solve it quickly. It may be to replace a damaged component, adjust an incorrect setting, or update the control program. No matter what the solution is, make sure to solve the problem thoroughly without leaving any trouble.
Troubleshooting and solving is a technical job that depends on your wisdom and experience. But as long as you are willing to study and practice, I believe that no matter what problems your LED display encounters, you can solve them in your hands! In this way, you can better enjoy the visual feast it brings!
结论
In summary, debugging after the installation of the LED display is a systematic and meticulous task that involves hardware connection, display effect, functional testing, stability, and other aspects.
Through a strict debugging process, we can ensure that the LED display reaches the best use state and brings an excellent visual experience to the audience.
At the same time, the debugging work is also a comprehensive inspection of the installation quality, which can discover and solve problems in a timely manner and avoid possible faults and hidden dangers in subsequent use.
最后,如果您想了解更多关于LED显示屏的知识, 请与我们联系。