Introduction

In the digital age, LED display screens have become the main force of information dissemination with their excellent display effects. However, the color difference problem when the module is replaced may affect its visual effect.
This article will explore how to use scientific methods to ensure that the color of the LED display screen after replacing the module is still vivid and maintains the best display effect.
1. Understand the color difference problem of the LED display screen
1). Specific reasons for color difference
When we appreciate the colorful pictures on the LED display screen, we occasionally encounter the phenomenon of uneven color or color deviation, which is color difference.
Color difference not only affects visual beauty but also interferes with the accurate communication of information. So, how exactly does color difference occur? Here are several key factors:
- Instability of module chip
Imagine that the LED display screen is composed of countless tiny LED lamp beads, and the “brain” of these lamp beads is the module chip.
If the chip is abnormal due to long-term work, aging or quality problems, just like the human brain occasionally “short-circuit”, the light emission of the lamp beads it controls will be unstable, resulting in color deviation.
- “Small faults” inside the lamp beads
Each LED lamp bead has a complex structure inside. If a part of it (such as the luminous material) is short-circuited due to manufacturing defects or long-term use, just like the filament in the light bulb is broken, the light emission of the lamp bead will be affected, and the color may become different.
- “Circuit blockage” of the PCB board
The PCB board is a bridge connecting the lamp bead and the chip. If the circuit on the board is short-circuited due to improper design, manufacturing defects, or external damage, just like the short circuit of the wires at home, the current cannot flow normally, causing the lamp bead to emit abnormal light and produce color differences.
- “Intimate contact” between modules
When installing the LED display, if the modules are installed too closely, or the modules are squeezed due to improper installation, it is as uncomfortable as people squeezing each other.
The module may also be deformed or the internal lamp beads may be damaged, which will affect the luminous effect and produce color difference.
- LED display screen modules from different batches
LED display screen is a customized product, so it is impossible to achieve the same color scheme every time the module is made. If a display screen uses LED modules manufactured in 2 or more batches, color difference will occur.
2). The profound impact of color difference on the display effect
Although the color difference problem is small, it has an impact on the effect of the LED display that cannot be ignored:
- The visual beauty is greatly reduced:
Imagine that you are enjoying a beautiful landscape painting, but the colors in the painting are dark and light in one place. Do you feel uncomfortable? Similarly, the color difference on the LED display will make the picture look unnatural and reduce the visual beauty.
- The information transmission is blocked:
If the display screen displays text or charts, the color difference may cause the text to be blurred and the chart to be unclear, thus affecting the accurate communication of information.
- The quality of the display screen is damaged:
Color difference is an important indicator to measure the quality of the display screen. Excessive color difference not only affects the display effect but also may reduce the life and reliability of the display screen.
- Increased maintenance costs:
Color difference problems often need to be solved through professional testing and maintenance, which not only takes time, but also may increase additional maintenance costs.
2. Preparation before replacing the module

Replacing the LED display module is a delicate and critical process. Adequate preparation in the early stage can ensure the smooth execution of the entire operation and minimize the occurrence of problems such as color differences. The following is the detailed preparation work that we must complete before replacing the module:
1). Carefully select spare modules
- Precise matching of specifications and models:
Modules are like “parts” of display screens, each with its own unique specifications and models. In order to ensure that the new module can be perfectly integrated into the existing display system, the first thing we need to do is to accurately match the specifications and models of the original module.
From size, and resolution to interface type, every detail cannot be ignored. Only in this way can the new module be seamlessly connected during installation to ensure the integrity and stability of the display screen.
- Detailed comparison of chromaticity and brightness:
Imagine that if the color and brightness of the light emitted by the new module are significantly different from the original screen, the effect of the entire display screen will be greatly reduced.
Therefore, when selecting spare modules, we also need to make a detailed comparison of chromaticity and brightness. This usually requires the use of professional color measurement tools to accurately measure and calibrate the spare modules to ensure that they are visually consistent with the original screen.
Of course, even if the modules are of the same model but not produced in the same batch, there will be color differences, so when purchasing, it is best to find the original supplier to purchase modules of the same model and the same production batch.
2). Carefully prepare calibration data
- Collection and organization of calibration data:
Calibration data is the color and brightness parameters of the module after professional calibration when it leaves the factory. It is essential to ensure that the module can maintain consistent display effects after replacement.
Before replacing the module, we need to collect the calibration data of the corresponding spare module from a USB flash drive or other storage device. These data are usually stored in the form of files, and we need to ensure their integrity and accuracy.
- Backup and verification of data:
The security and accuracy of data are key in the process of replacing modules. Therefore, after collecting the calibration data, we need to back it up to prevent data loss or damage.
At the same time, we also need to verify the accuracy of the data to ensure that it matches the module we are about to replace. This is usually achieved by comparing the parameters in the data file with the parameters of the module itself.
3. Detailed steps for replacing LED display modules
Replacing LED display modules is a process that requires meticulous operation. The following are the detailed steps we have organized for you to ensure the safety and accuracy of the replacement process:
1). Safely remove the problem module
- Mark the module position:
Before starting to remove the problem module, you first need to accurately mark the coordinate position of the module with a marker or label paper. This helps to quickly locate the new module when installing it, ensuring the alignment between modules and the integrity of the overall display.
- Record the reason for the repair:
While removing the module, record the specific reason for the repair. This helps us analyze the cause of the module damage so that preventive measures can be taken in future maintenance. At the same time, this also provides a valuable record of the maintenance history of the display.
- Safely remove the module:
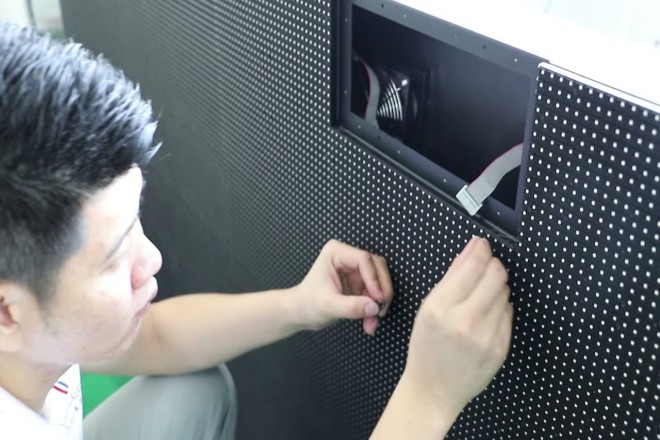
When removing the module, be careful and avoid using brute force or improper tools. Usually, we can use professional disassembly tools to disassemble it step by step in the reverse order of module installation. During the disassembly process, pay attention to protecting the surrounding modules and connecting wires to avoid causing additional damage.
2). Install a new spare module
- Accurately align the new module:
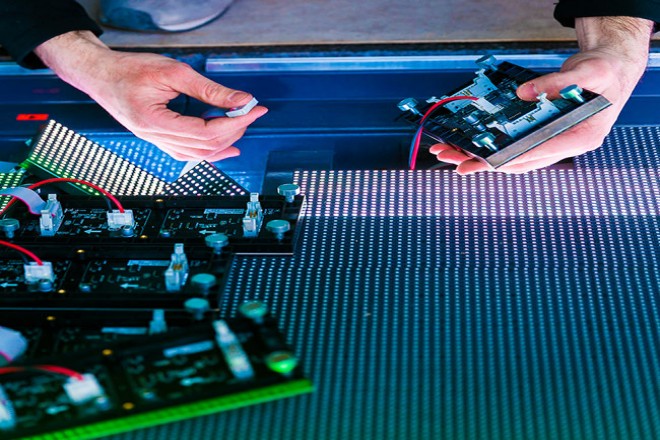
When installing a new module, we need to ensure that the new module is accurately aligned with the original position. This can be achieved by referring to the module position marked previously. After alignment, we can use appropriate fixing tools (such as screws or clips) to fix the new module to the display frame.
- Check the connection wire:
The connection wire is the bridge between the module and the display control system. After installing the new module, we need to carefully check the integrity of the connection wire and the reliability of the contact.
Make sure that each connection line is firmly plugged in and that there is no looseness or damage. At the same time, we also need to check the direction and fixation of the connection line to avoid external pressure or pulling.
- Test the display effect:
After completing the replacement of the module and checking the connection line, we need to test the display effect. By playing some colorful images or videos, observe the color difference and brightness difference between the new module and the surrounding modules.
If any problems are found, we need to adjust and calibrate immediately to ensure that the display effect of the entire display is consistent.
4. Color difference correction technology

When we have completed the replacement of the LED display module, the next key step is color difference correction.
This process aims to ensure that the entire display achieves perfect uniformity and consistency in brightness and color so as to bring the best visual experience to users.
Next, we will explain two color difference correction technologies in-depth, single point correction technology, and smart device correction technology, so that you can easily understand and master them.
1). Single-point correction technology:
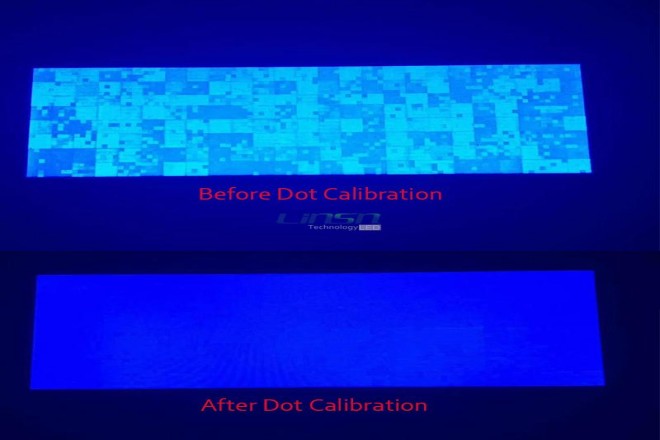
Single point correction technology, as the name suggests, is to perform a separate correction on each pixel on the display.
This technology uses professional calibration equipment and software to accurately measure and adjust the brightness and chromaticity of each pixel, thereby ensuring that the display effect of the entire display screen is in the best state.
In actual operation, the steps of single-point calibration technology are as follows:
- Professional measurement:
First, the calibration personnel will use professional measuring equipment to measure the brightness and chromaticity of each pixel on the display screen. These measurement data will serve as the basis for subsequent calibration.
- Data analysis:
Then, the calibration software will analyze these measurement data to find out the deviation between each pixel and the ideal state.
- Correction coefficient calculation:
Based on these deviations, the calibration software will calculate the correction coefficient that needs to be adjusted for each pixel. These coefficients will be used to adjust the brightness and chromaticity of the pixel to achieve the ideal state.
- Send correction coefficients:
Finally, through the host computer, these correction coefficients will be sent to each module of the display screen. The module will adjust the display effect of the pixel according to these coefficients to eliminate color differences.
The advantage of single-point calibration technology is that it can accurately control the display effect of each pixel to ensure the uniformity and consistency of the entire display screen. However, since each pixel needs to be calibrated separately, this process may be relatively time-consuming and cumbersome.
2). Smart device calibration technology:
With the advancement of technology, smart devices are increasingly used in color difference calibration. Smart device calibration technology, with its high efficiency and convenience, brings users a new calibration experience.
The steps of smart device calibration technology are as follows:
- Smart search and connection:
Smart devices are usually equipped with wireless connection functions, such as Wi-Fi or Bluetooth. Users only need to connect the smart device to the display screen, and the smart device will automatically search and identify the display screen and its modules.
- Read configuration information:
After the connection is successful, the smart device will read the configuration information of the display screen, including resolution, number of modules, etc. This information will be used in the subsequent calibration process.
- Automatic calibration:
The smart device will automatically identify the newly replaced module and the reference module (usually the module that has not been replaced on the display screen and has a good display effect). Then, the smart device will automatically calibrate the newly replaced module based on the reference module.
- Calculation and transmission of correction coefficients:
During the calibration process, the smart device will measure the color difference between the newly replaced module and the reference module in real-time and calculate the correction coefficient based on the measurement results.
Then, the smart device will send these correction coefficients to the newly replaced module through the host computer. The module will adjust the display effect according to these coefficients to eliminate the color difference.
Conclusion
Through the guidance of this article, we understand how to effectively solve the color difference problem after the LED display module is replaced. With the continuous development of technology, we expect LED displays to provide a more excellent visual experience.
Of course, if you are not very proficient in electrical aspects, then we still recommend that you find a professional to repair and replace it and pay attention to electrical safety.
Finally, if you want to know more about LED displays, please get in touch with us.
