
1). Check the power supply and signal connection
1.1). How to confirm the stability of the 전원:
Pick up a multimeter or power supply tester and carefully measure the power supply voltage to ensure that it is stable within the specified range of the display screen.
If the voltage is too high or too low, it is like feeding a dose of poison to the electronic components of the LED display screen, and they may burn them one day. Also, don’t forget to check the power supply line to see if there is any aging or damage.
If there is, replace it with a new one quickly so as not to be in a bad situation if the voltage is unstable or the power is suddenly cut off one day.
The power connector must also be carefully checked to ensure that it is not loose or rusted. The power supply must be guaranteed to be stable, just like giving the display screen reassurance.
1.2). What happens if the power connection is incorrect?
The LED display may be like a sleeping child, you can’t wake it up, the screen is always black or flashing, which makes people anxious.
You are using the display to display important content, and suddenly the power is cut off. Then the content will be interrupted, the activity will definitely be affected, and you may even be blamed.
Long-term unstable or too high voltage is like chronic poisoning of the display. The components inside will gradually break down, and the service life will be greatly reduced.
1.3). In addition, voltage fluctuations should be avoided:
If conditions permit, it is better to equip the LED display with a voltage stabilizer or uninterruptible power supply (UPS). This is like hiring a bodyguard for the display, and no matter how much the voltage fluctuates, it will not hurt it.
You should check the power supply regularly to see if there are any “culprits” that may cause voltage fluctuations, such as large motors starting, thunder, etc., so that they will not “harass” the display and affect its work.
2). Check the signal line connection
2.1). Check the integrity of the signal cable:
Take a close look at the signal cable, from beginning to end, to make sure there are no broken, damaged or exposed parts. If the signal cable is broken, it is like a kite with a broken string, the signal cannot be transmitted, or it is blurred and cannot be seen clearly.
The length and specifications of the signal cable must also be correct, too long or too short is not good. If it is too long, it is like taking a long detour, and the signal will be weak when it is transmitted.
If it is too short, it is like being squeezed in a narrow alley, and the signal cannot be transmitted. Both will affect the signal quality, making the image blurry and the color wrong.
2.2). Confirm that the signal cable is firmly connected:
The signal cable connector must be plugged in tightly; don’t let it loose. If it is loose, it is like a door that is not closed tightly, and it will open when the wind blows, and the signal will have poor contact, and the image will flicker or simply disappear.
If you use a BNC, HDMI, or DVI interface, you must take a closer look at the pins in the interface. Don’t bend, break, or rust; they are like potholes on the road, which prevent the signal from passing or make it crooked.
2.3). If the signal line is not connected correctly:
The LED display may be like a deaf person, unable to hear the sound of the signal, and the screen is always black or displays something strange, which makes people confused.
The image color may be wrong, red, orange, yellow, green, blue, purple are all mixed together, and they are flashing, and there are stripes like ripples, which are dazzling.
You are doing an event, and suddenly the signal line is broken, the LED display screen is black or displays abnormally, then the event will be messed up, just like a good show suddenly ruined.
1). Light Control
1.1). Adjust the 명도 of the display screen according to the light conditions of the event venue
- Things to do during the on-site investigation:
When you walk to the event venue, look up at the sky first to see the intensity and direction of natural light, especially the position and angle of the sun, which will directly affect the visibility of the LED display.
Look around to see if there are any artificial lights, such as 단계 lights, venue lighting, etc. Their brightness and color will also affect the display.
Take a small notebook or mobile phone to write down the changes in light in the morning, noon, and evening, and the differences in light on sunny, cloudy, and rainy days. In this way, you will have a bottom line in your mind and know when to adjust the brightness and when to dim it.
- Tips for brightness adjustment:
After looking at the lighting conditions of the venue, it is time to adjust the brightness of the display. If the light outside is strong, such as on a sunny day, then we will brighten the display so that the image can be clear even under strong light.
If the light outside is weak, such as on a cloudy day or at night, then we will dim it to avoid glare, save electricity, and extend the service life of the display.
The brightness can be adjusted manually, that is, use the remote control or control system to poke and click to find the most suitable brightness value.
It can also be used automatically, that is, pre-set a brightness change curve, and let the display adjust the brightness according to time or light sensor, which is smarter and more worry-free.
- Brightness test:
After adjusting the brightness, don’t rush to leave, you have to test the effect. Stand in different positions to see if the image is clear and the color is accurate. If you find that some places are not clear or the color is wrong, adjust the brightness again until you are satisfied.
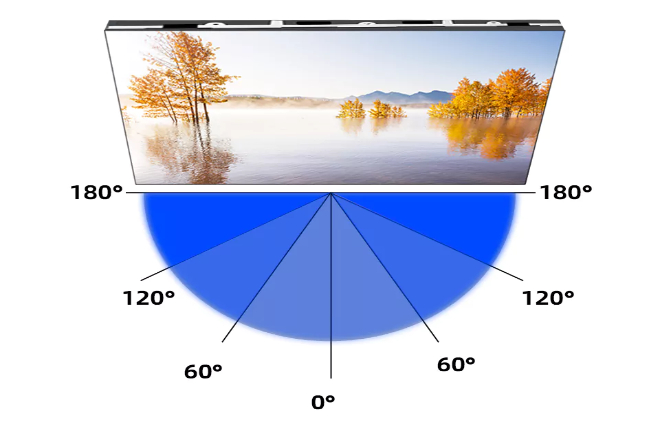
2). 시청 거리 그리고 각도
2.1). Adjust the viewing angle according to the dot pitch of the display and the distance of the audience.
- Tips on dot pitch:
The dot pitch is the distance between two adjacent pixels on the display. The smaller the dot pitch, the higher the resolution of the display and the clearer the image. However, there are also requirements for viewing distance.
If you look too close, it will be pixelated, and if you look too far, it will not be clear. Choose a display with a suitable dot pitch according to the needs and budget of the event.
It must meet the requirements of the viewing distance and have a good display effect. For example, you can choose a display with a smaller dot pitch for indoor activities and a display with a larger dot pitch for outdoor activities.
- Adjust the 시야각:
Calculate the viewing angle according to the dot pitch of the display and the distance of the audience. Generally speaking, it is good to keep the viewing angle within a certain range of the normal direction of the display (such as ±30° or ±45°).
If the audience is far away, the viewing angle can be larger to cover more viewers; if the audience is close, the viewing angle should be smaller to avoid image distortion or color shift.
The viewing angle can be adjusted by using an adjustable bracket or adjusting the installation angle of the display.
If there is no adjustable bracket or the installation angle is difficult to adjust, you can also consider using other methods to adjust the viewing angle, such as padding something under the display or tilting the display a little.
2.2). Avoid the audience standing too close or too far away to watch
- Viewing distance control tips:
According to the size and resolution of the display, as well as the needs of the audience, set a reasonable viewing distance range. Generally speaking, the viewing distance should be 1.5 to 2 times the diagonal length of the display.
If the viewing distance is too close, the audience will see pixels, affecting the viewing effect; if the viewing distance is too far, the audience cannot see the content on the display clearly.
Set up landmarks, fences, or signs at the event site to guide the audience to stand at a suitable distance to watch the display.
Landmarks can be made of ribbons, balloons, or flags; fences can be made of ropes, chains, or fences, and signs can be written in eye-catching colors and fonts.
You can also ask staff or volunteers to guide the audience on site, so that they don’t stand too close or too far. Staff or volunteers can wear uniform clothing or wear eye-catching signs so that the audience can easily recognize them.
- Viewing experience optimization action:
In addition to controlling the viewing distance, you must also consider the viewing angle and height of the audience. The audience must be comfortable to watch, and don’t let their necks hurt or their eyes get tired.
For example, you can set up a slope or steps so that the audience can easily find the right viewing angle and height.
You can set up multiple viewing areas to meet the needs of different audiences. For example, set up a lower viewing area for children, prepare some small stools or mats for them.
Set up a higher viewing area for adults, prepare some platforms or railings for them. This can ensure the viewing effect of both children and adults.
During the event, we need to pay more attention to the audience’s feedback and opinions, and adjust and optimize the viewing environment in time. For example, adjust the brightness, contrast or color parameters of the display screen according to the audience’s feedback to make the audience happier.
Or adjust the position and size of the viewing area according to the audience’s feedback to make the audience stand more comfortably. In short, we want to make the audience feel our care and concern!
1). Image and video processing
1.1). Use high-해결 image and video materials to ensure clear display effects
- Material selection points:
When selecting images and videos, you have to find those with high resolution, at least matching the resolution of the LED display screen, otherwise it will be blurry when played, and it will be difficult for the audience to watch.
Materials with rich colors and high contrast are also better, which can make the color performance of the display screen more colorful.
Don’t forget to consider the content and style of the material, and it must be related to the theme of the event to attract the audience.
- Material preparation process:
First, you have to collect materials widely, including photos, illustrations, animation clips, promotional videos, and everything you can use.
Then you have to screen and remove those with poor quality and inconsistent style.
The next step is the processing stage. Use image and video editing software to crop and resize, and do color correction to make the color of the material and the display look more harmonious.
The last step is a preview. You have to see how the processed material looks on the display. If not, you have to adjust it again.
1.2). Perform color correction and brightness adjustment on images and videos to adapt to the characteristics of the display
- Color correction tips:
Use color correction tools to adjust color temperature, saturation, and contrast to make the color of the material match the display better. The color of each display may be a little different, so it is best to calibrate the color on site to ensure consistent results.
Sometimes, a slight adjustment of the color can make the whole picture feel completely different, so you have to do this more carefully.
- Brightness adjustment method:
If the brightness of the LED display is high, adjust the image and video brightness lower to avoid suffering the audience’s eyes. If the brightness is low, you have to increase it so that the audience can see clearly.
Also pay attention to the contrast between light and dark, so that the audience can’t see what’s going on after a long time.
- Practical application suggestions:
The color and brightness adjustment should be combined with the field test results, and should be tested at different times and under different lighting conditions to ensure stable results.
The audience’s perception of color is also different, so you can prepare several color modes and brightness levels in advance and let the audience choose.
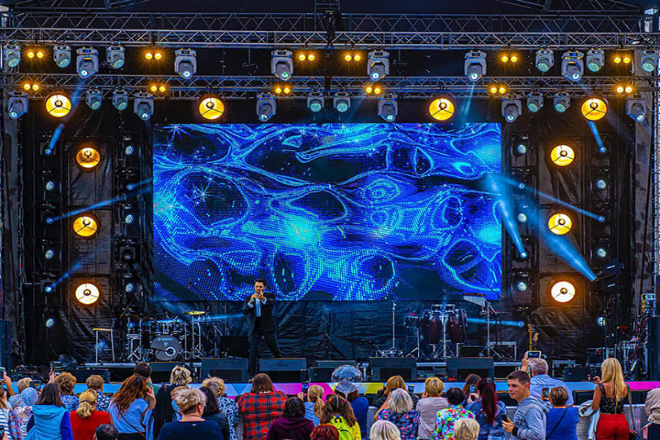
2). Dynamic content design
2.1). Design dynamically changing display content to attract the audience’s attention
- Principles of dynamic content design:
Dynamic content must be interesting and visually impactful, and it can catch the audience’s attention at once. Elements such as animation, special effects, and transitions must be used to make the content more vivid.
It must also be consistent with the theme and style of the event, so as to convey the core information and atmosphere of the event.
- Specific design ideas:
Design dynamic patterns or animation clips according to the theme of the event. Science and technology activities must have a sense of technology, and literary and artistic activities must have an artistic atmosphere.
Dynamic content can display key information such as event information, brand logos, and product features. For example, use animation to tell the audience the name, time, and location of the event, or use special effects to show the brand logo and product features.
You can also combine dynamic content with music and sound effects to make the audience more immersed. Choose the right background music and sound effects to perfectly match the dynamic content.
- Design skills and tools:
Use animation design software to create dynamic content and special effects, such as Adobe After Effects. This software has a rich library of special effects, and you can do whatever you want.
The animation should be smooth and natural and don’t make the audience feel stiff and abrupt. You can adjust parameters such as animation speed and acceleration to make the animation effect better.
2.2). Consider the frequency and rhythm of content switching to keep the audience interested
- Switching frequency control:
The content switching should not be too frequent or too slow. If it is too frequent, the audience cannot absorb the information, and if it is too slow, the audience will feel bored.
The switching frequency should be set according to the duration of the event, the audience’s attention span, and the nature of the content. For example, short-term activities should switch quickly to keep the audience excited.
Long-term activities should switch slowly to leave some time for the audience to think and rest.
- Rhythm control skills:
When designing dynamic content, you must control the rhythm. You can adjust the animation speed, special effect intensity, and content arrangement in order to create different rhythms.
For example, fast-paced parts use fast animations and strong special effects to create a tense and exciting atmosphere; slow-paced parts use slow animations and soft special effects to create a quiet and comfortable atmosphere.
You can also combine fast-paced and slow-paced content to create contrast and tension. In this way, the audience will always maintain interest and expectations during the viewing process.
- Practical application suggestions:
During actual playback, you should observe the audience’s reactions and feedback to see how they accept and are interested in dynamic content.
If necessary, you must adjust the content switching frequency and rhythm in time to meet the audience’s expectations and needs.
You can also flexibly adjust the playback order and combination of dynamic content according to the progress of the event and the change in atmosphere.
For example, at the beginning of the event, use fast-paced and strong dynamic content to attract the audience’s attention.
In the middle of the event, use slow-paced and soft dynamic content to give the audience some time to think and rest.
At the end of the event, use fast-paced and strong dynamic content to create a climax and ending atmosphere.
In this way, the whole event will be more vivid and interesting!

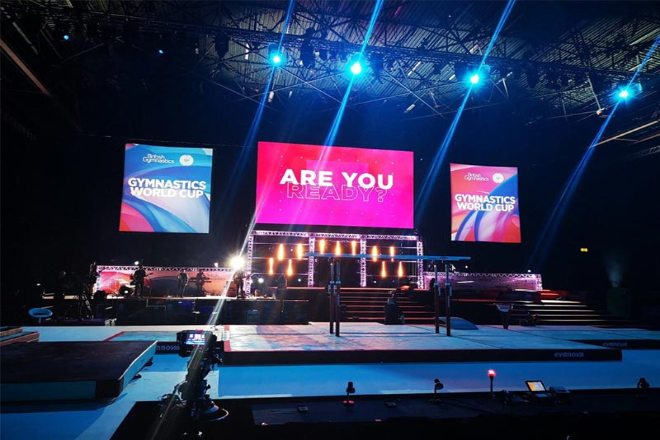
1). Display layout
1.1). According to the event venue and audience distribution, reasonably plan the layout of the display
- Site analysis:
Investigate the event venue on site, measure the specific dimensions of the venue, and understand the shape of the venue, whether it is rectangular, square or other irregular shapes.
Observe whether the ground is flat, whether there are potholes or bulges, which will affect the placement stability of the display.
Pay attention to whether there are obstacles in the venue, such as pillars, trees, etc., which may block the audience’s line of sight or affect the installation position of the display.
Analyze the lighting conditions of the venue, especially the changes in natural light, such as the angle and movement of the sun, to avoid the display screen being in direct sunlight, causing reflection or overheating.
Consider the impact of stage lighting on the display screen, and ensure that the lighting does not interfere with the display effect of the display screen.
- Audience distribution:
Predict the distribution area of the audience based on the nature of the event and the expected number of audience. For outdoor concerts or sports games, the audience may be distributed over a wide area.
Consider the height and angle of the audience’s line of sight to ensure that the position of the display screen does not block the audience’s line of sight.
For example, the display screen should not be placed directly behind the performers on stage to avoid the performers blocking the display screen.
Analyze the flow path of the audience to ensure that the installation location of the display screen will not hinder the audience’s entry, exit and evacuation.
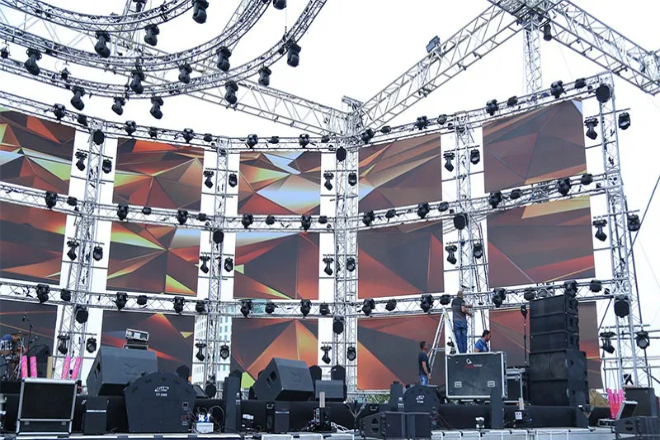
1.2). Consider the number, size, and location of the display screens
- Quantity:
Determine the number of display screens required based on the scale of the event and the expected number of audiences.
For large events, multiple display screens may be required to form a video wall to expand coverage and enhance visual effects.
Consider the coordination and interaction between the display screens, such as the main display screen is used to play the main video content, and the auxiliary display screen is used to display lyrics, advertisements or interactive information.
Ensure that the content between the display screens is smoothly connected and the screen switching is natural to avoid visual discontinuity for the audience.
- 크기:
Choose the appropriate display screen size based on the size of the venue and the distance from the audience.
Too large a size may make installation difficult and costly; too small a size may affect the viewing effect and make it difficult for the audience to clearly see the content on the display screen.
Consider the resolution and pixel density of the display screen to ensure that the picture is clear and delicate. High resolution and appropriate pixel density can provide a better visual experience, allowing the audience to clearly see every detail on the display screen.
- Position:
Choose a location where the audience can see the display screen most easily, such as the center of the stage background, a prominent location at the entrance of the venue, or a high place opposite the auditorium.
Consider the height and angle of the display screen to ensure that every audience member can view the display screen with a comfortable line of sight. Positions that are too high or too low may cause neck fatigue or obstructed vision.
Ensure that the installation position of the display screen is stable and reliable to avoid shaking or tipping due to wind or other external forces.
2). Professional installation and commissioning
2.1). Hire a professional team to install and debug the display screen
- Select a team:
Choose an installation team with rich experience and professional qualifications to ensure the installation quality and safety of the display screen.
You can evaluate the team’s professional capabilities by looking at the team’s historical project cases, customer reviews, and industry certifications.
Communicate fully with the installation team to clarify the installation requirements and expectations, including the layout, quantity, size, location, and installation time of the display screen.
Ensure that the installation team has a full understanding of the event requirements and display screen characteristics, and can operate in accordance with planning requirements and installation specifications.
- Supervise the installation:
During the installation process, assign a dedicated person to supervise on-site to ensure that the installation team operates in accordance with the planning requirements and installation specifications to avoid installation errors or omissions.
Carry out quality inspections on key links in the installation process, such as the fixing method of the display screen, the layout, and fixing of the connecting wires, etc., to ensure reliable installation quality and avoid safety hazards.
Communicate with the installation team in a timely manner to solve problems and difficulties encountered during the installation process to ensure smooth installation progress.
2.2). Ensure that the display screen is installed firmly and flatly without shaking or tilting
- Firmness check:
Check the firmness of the fixed brackets and connectors of the display screen to ensure that they can withstand the weight of the display screen and external forces such as wind force, and will not loosen or fall off.
After the installation is completed, perform a shake test on the display screen, gently shake the display screen, and check whether there is any looseness or shaking. If found, immediately reinforce it to ensure that the display screen is stable and reliable.
Considering the maintenance needs during long-term use, ensure that the fixed structure of the display screen is easy to disassemble and reinstall, which is convenient for subsequent maintenance and replacement work.
- Flatness adjustment:
Use tools such as a level to measure and adjust the flatness of the display screen to ensure that the surface of the display screen is flat and has no bumps and avoids picture distortion or deformation.
During the adjustment process, pay attention to protecting the surface and edges of the display screen to avoid scratching or damaging the display screen. Use a soft cloth or professional protective film to cover and protect it.
Recheck the adjusted display screen to ensure that the picture is clear and not distorted and that the colors are bright and uniform. If necessary, you can make subtle adjustments and optimizations to achieve the best display effect.
1). Audio equipment
1.1). Equipped with high-quality audio equipment to enhance the audio-visual effect
- Choose professional and cool audio:
We have to choose professional audio with super clear sound and high fidelity, such as those big-name professional speakers, power amplifiers, and mixers. In this way, the audience can hear every detail and feel like they are in the scene.
The frequency response range of the audio is also very important. You have to choose the kind that can cover all the frequencies that the human ear can hear, so that the sound is comprehensive and balanced.
You also need to choose a speaker with appropriate power according to the size of the venue and the number of spectators. If it is too loud, the sound will explode, and if it is too loud, the audience will not be able to hear it. It has to be just right.
- There are also some rules for how to place the speakers:
The speakers should be placed where the audience can see and hear them, such as in front of or on the side of the auditorium. In this way, the sound can be evenly transmitted to each audience’s ears.
Never let the speakers face the LED display directly, otherwise the sound will bounce back and affect the picture effect. If you really can’t avoid it, use some sound-absorbing materials or soundproofing boards to block it.
The height and angle of the speakers must also be adjusted properly to prevent the sound from being blocked or echoing.
1.2). Adjust the audio and video to make them perfectly synchronized
- Synchronization debugging requires some effort:
Before the event starts, we have to use professional tools and methods, such as time code synchronizer and audio and video synchronization software, to carefully debug the audio and video.
We must ensure that the sound and picture are completely synchronized so that the audience can immerse themselves in the event and feel super awesome.
You have to try different scenes to see how the synchronization effect is, and adjust them in time if there is a problem.
- On-site monitoring, ready to adjust at any time:
The event site needs to have some audio and video monitoring equipment, such as audio monitors and video monitors, to check whether the audio and video are synchronized at any time.
You need to find someone who knows the business to be responsible for monitoring, so that any problems can be discovered and solved immediately.
You also need to prepare some emergency plans, such as backup speakers and synchronization adjustment tools, just in case.
2). Integration of interactive equipment
2.1). Add some interactive equipment to make the audience more excited:
You need to choose some interactive equipment suitable for the event, such as touch screens, sensors, etc. The touch screen allows the audience to click and play by themselves, and the sensor allows the audience to interact with the display screen through actions.
The equipment must be easy to use and stable, and it should not break down after a while. It must also be compatible with the LED display screen so that they can work together.
You also need to think about where to put the interactive equipment, so that it is convenient for the audience to use. For example, the touch screen can be placed in front of the audience seats, and the sensor can be installed on the side of the stage.
You also need to consider the safety of the equipment, such as adding a guardrail and using some anti-collision materials to prevent the audience from getting hurt.
2.2). Design some interactive links to make the audience have more fun:
You need to think of some creative and interesting interactive links to let the audience participate. For example, design a touch screen game for the audience to play, or use sensors to let the audience interact with the performers on the stage.
The interactive link must be linked to the content of the LED display screen, so as to make full use of the effect of the display screen. For example, the display screen can display game pictures or interactive information, and the audience can operate through the touch screen or sensor.
The interactive link should not be too difficult or too boring, and the audience should find it fun and want to participate.
- On-site guidance and feedback collection:
There should be some guiding signs and instructions at the event site to tell the audience how to participate in the interactive link. Posters, brochures, and electronic display screens are all fine.
You need to find a few staff members to guide the audience on-site and answer their questions.
After the event, you need to collect some feedback from the audience to see how the interactive link is and whether there is any room for improvement. Questionnaires and on-site interviews are all fine, and the next event can be improved based on the feedback.