
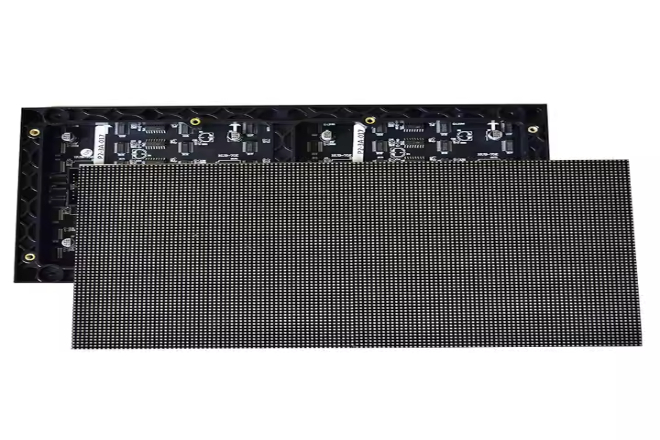
Every time they purchase an 발광 다이오드 표시 스크린, some merchants will give customers some spare LED display screen modules.
It is convenient to replace the modules as soon as they are damaged. However, if these spare modules are not stored properly, their performance may be degraded or even damaged.
The correct storage method can not only extend the service life of the modules but also ensure that they can work normally when needed. So, how do you scientifically store spare modules of LED display screens?
1). Determination of temperature range
In what temperature environment should spare modules of LED display screens be stored? Generally speaking, the temperature is best controlled between -40℃ and 85℃. This range sounds wide, but it is actually very particular.
Why? Because temperature has a great impact on the small components of the module. Let’s talk about high temperature.
If the temperature is too high, the chips in the module will be like a “steaming sauna,” and the aging speed will be accelerated.
Think about it: it’s a pity that the chips that could have been used for a long time “retired” early because of high temperature. Moreover, high temperature will also reduce the luminous efficiency of the light-emitting chip.
In simple terms, the 명도 is not enough, and it looks dim. What’s more serious is that the packaging material will not be able to bear it and may deform or even crack, causing the chip to “strike” directly.
Let’s look at the low temperature. Low temperatures will make the plastic parts in the module become like crispy biscuits, and they may break with a slight touch.
Moreover, low temperatures will affect the performance of electronic components and prevent them from working properly.
It’s like when you go out in winter, your hands are frozen stiff, and you can’t even press your mobile phone. The same is true for electronic components. If the temperature is too low, they will be “frozen.”
The temperature changes in different seasons and regions are very different. For example, in summer, the temperature in the south can soar to 40℃ or more. At this time, air conditioning is needed to cool down.
If it’s winter in the north, the temperature can drop to below zero. Then the heater will come in handy. Moreover, the temperature setting must be flexibly adjusted according to the specific situation.
For example, when it’s hot in summer, adjust the air conditioner to about 25℃ so that people are comfortable and the module is safe.
When it’s cold in winter, turn on the heater to about 10℃ to ensure that the module will not be frozen.
2). Temperature monitoring and adjustment measures
Temperature monitoring is not something you can take lightly. There are many easy-to-use temperature and humidity sensors now, and they are easy to install.
These sensors are best installed in several key locations in the storage space, such as where the modules are placed most, near the vents, etc.
In this way, you can monitor temperature changes in all directions without missing any corners.
The method of use is also very simple. Just connect the sensor to the monitoring system and check the data regularly. However, it is important to check the accuracy of the sensor regularly.
Just like the thermometer we use, if it is inaccurate, it will be troublesome. It is recommended that it be calibrated once a month to ensure that the measurement results are reliable.
If the temperature of the storage space exceeds the appropriate range, measures must be taken immediately.
For example, if the temperature is high, the air conditioner must be used. When choosing an air conditioner, the power should be determined according to the size of the storage space and the number of modules.
Generally speaking, a 1-horsepower air conditioner is enough for a 10-square-meter space. If the temperature is low, the heater must be used.
Similarly, the power of the heater should be selected according to the actual situation. For example, a 3,000-watt heater can handle a 50-square-meter space.
There is also a dehumidifier, which should be used with care. The dehumidifier should be placed in a well-ventilated place and should not be blown directly at the module; otherwise, the local temperature will be high and low at times, and the module will not be able to bear it.
Moreover, the working time and humidity range of the dehumidifier should be reasonably set according to the humidity conditions.
In short, when storing the spare modules of the LED display screen, temperature control cannot be vague.
If the temperature is well controlled, the service life of the module can be extended, and when they are needed, they can also “go to work” normally without falling off the chain.
1). Damage to the module by dust
Let’s talk about dust first. If dust adheres to the LED display backup module, it will cause real trouble.
If there is too much dust, the heat dissipation effect will deteriorate, and the module will easily overheat.
It’s like putting a “thick cotton coat” on the module, and the heat cannot be dissipated, so the module is prone to “fever”.
Moreover, dust will block the heat dissipation holes, which is like “pasting” the heat dissipation holes, making heat dissipation more difficult.
What’s worse is that if dust gets into the connector, the contact will be unstable and the performance of the module will be greatly reduced.
Over time, the service life of the module will be shortened and the display effect will deteriorate.
We can compare two modules, one is clean and the other is full of dust. After using it for a period of time, the clean module has good heat dissipation and stable display effect.
While the dusty module has poor heat dissipation and poor display effect, and even some strange problems such as flickering and uneven color will occur. This can intuitively see how harmful dust is.
2). Dust-proof method and material selection
2.1). Dust-proof packaging material
To prevent dust, the packaging material must be selected well. Anti-static packaging bags are a good choice.
They can prevent static electricity from absorbing dust and protect the module from static damage. Sealed plastic boxes can also prevent dust.
As long as you put the module in and cover the lid, dust will not get in.
Before packaging, you must first wipe the module clean, and don’t package it with dust. When packaging, make sure it is well sealed.
For example, when using anti-static packaging bags, the seal must be tight and no gaps should be left.
If you use a sealed plastic box, the lid must be closed tightly to ensure that dust cannot get in.
2.2). Dust-proof isolation of storage space
In the storage space, you can also set up a dust-proof isolation area. For example, cover the module with a dust cover, or separate the storage space with a partition wall, and set aside a clean area to place the module.
It is also important to clean the dust in the storage space regularly. You can use a vacuum cleaner to clean the dust and keep the environment clean.
In short, dust prevention cannot be sloppy. If dust prevention measures are taken, the module can “rest” well in a clean environment, and when it is needed, it can work normally without malfunctioning due to dust problems.
1). Placement principle
How do you place the spare modules for the LED display? This matter cannot be messed up. It must be a bit particular. First of all, the placement principle must be determined according to the shape, size, and weight of the module.
For example, the modules are classified according to the model and specification of the module so that it is convenient to find and different modules will not be confused.
If they are piled together in a mess, it will not only be troublesome to find but also easy to damage the module.
When placing, make sure the module is placed flat and stable. Don’t place it at an angle or let it hang in the air, otherwise the module may be deformed by gravity or the connector and other parts may be damaged.
Just like if you put something, if it is not placed steadily, it will easily fall. The same is true for the module, which must be placed steadily.
2). Stacking precautions
Speaking of stacking, there are also many things to pay attention to. First of all, you need to put some support between each layer of modules, such as foam boards or wooden boards.
This can disperse the pressure and prevent the module from being deformed by pressure. If you stack them directly layer by layer, the modules below will not be able to bear it and will be easily crushed.
The stacking height should not be too high; otherwise, the modules below will be under too much pressure and will be easily damaged.
Generally speaking, the stacking layout should be reasonably planned according to the size of the storage space and the number of modules.
For example, when the space is small, and there are many modules, you can stack them higher, but you must ensure safety.
If the space is large, don’t stack them too high so that they are convenient to carry and check.
Moreover, the stacked modules should be easy to move around and be checked at any time. If they are stacked in a mess, it will take a lot of effort to take out a module, which will be troublesome.
1). Anti-static measures
Static electricity is an invisible “killer” for spare modules of LED display screens.
Static discharge can instantly generate very high voltages, directly “electrically” damaging the sensitive electronic components in the module, causing functional abnormalities at the least and direct scrapping at the worst.
Therefore, anti-static measures are essential when storing and transporting modules.
There are many common anti-static “artifacts.” For example, when you wear anti-static gloves, no static electricity will be generated when your hands touch the module.
There is also an anti-static workbench, which can prevent static electricity accumulation by placing the module on it for operation.
Anti-static packaging materials are also very important, such as anti-static bags and anti-static foam, which can wrap the module tightly to prevent static electricity from “making trouble” during transportation and storage.
A special anti-static area can also be set up in the storage space.
For example, anti-static flooring can be laid, and anti-static shoes can be worn so that static electricity can be conducted away when people walk and will not accumulate on the body.
In addition, all equipment and workbenches must be grounded so that static electricity can be safely introduced into the ground through the grounding system.
2). Anti-shock measures
Speaking of anti-shock, this is also critical. When transporting, the module will inevitably shake. If it is not well protected, the connector may loosen, the internal components may shift, or even be directly damaged.
If the storage place is in an earthquake-prone area, you must be more careful, as even a slight earthquake may cause the module to “suffer.”
Anti-shock packaging materials are the first line of defense. Foam plastics and air cushion films are both good choices.
They can disperse pressure well and wrap the module like a “marshmallow.” Even if there is vibration, it can reduce the impact. Anti-shock brackets are also useful.
Fixing the module on the bracket can prevent it from shaking during storage and transportation.
When installing and using these anti-shock facilities, you must also pay attention to the method.
For example, the foam plastic should fit the shape of the module completely without leaving any gaps.
The air cushion film should be inflated sufficiently, but not too much; otherwise, it may break.
The shockproof bracket should be installed firmly to ensure that the module is stable on it.
In short, anti-static and anti-shock measures are the “shield” to protect the spare modules of the LED display. If these are done well, the modules will be less damaged during storage and transportation, and they will be more reliable to use.