
Due to long-term use or external factors, some LED display modules may be damaged, aged or have performance degradation. At this time, we need to replace the module.
Although replacing the LED display module seems to be a complicated task, as long as we master the correct methods and precautions, we can complete it smoothly. Let’s learn together.
1). Tool preparation
To replace the LED display module, you must first prepare all the tools. You have to find a suitable screwdriver to disassemble and install the display housing, as well as the small screws that fix the module.
Tweezers are also indispensable. Sometimes, you have to use them to handle some small parts or adjust the position of the module. If the module requires special tools to remove, you also have to prepare a board remover.
By the way, if you encounter a module that is soldered on a circuit board, a hot air gun will come in handy, which can help you easily remove the module.
Finally, don’t forget the multimeter, which is a magic tool for detecting circuit connections and ensuring that the circuit is normal after the new module is installed.
If your display has a backlight, you must prepare a backlight module replacement manual, otherwise you will be in a hurry and don’t know how to start.
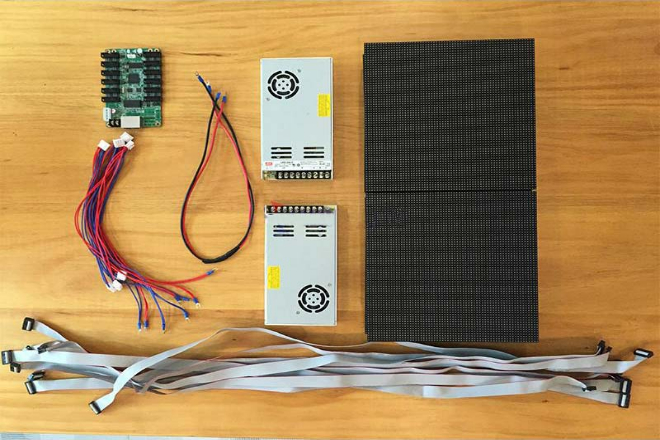
2). Material preparation
When choosing a new module, you must open your eyes and look carefully to ensure that it is exactly the same as the original module in terms of size, interface type, resolution, and brightness. Otherwise, it will not fit when installed. In addition, the appearance and quality of the new module must be checked clearly to ensure that there is no damage or defects.
In addition to the new module, some auxiliary materials must also be prepared. For example, solder paste or solder wire is used to weld the connection between the module and the circuit board.
Flux promoter is also necessary, which can make the welding quality better and reduce the situation of false welding or cold welding; sometimes copper wire may also be needed to strengthen or repair the circuit connection; finally, glue must be prepared in case the module needs to be fixed or the shell needs to be repaired.
3). Safety and environmental inspection
Safety is the top priority! Before replacing the module, remember to disconnect the power supply. Don’t remove the module while the power is on. That would be too dangerous. Also, anti-static measures must be taken, such as wearing an anti-static bracelet, otherwise static electricity will damage electronic components.
Also, pay attention to the environment. Check whether the temperature and humidity of the working environment meet the storage and use requirements of the LED display. It is not good to be too hot or too cold, and it is not good to be too humid; otherwise, the display will be affected.
Also, the working environment must be kept clean and dry, without dust and corrosive gases. Otherwise, it will be a big threat to the display.

1). Power off and fixation
Don’t rush when you start disassembling the module. Safety first. You have to cut off the power supply first. This is the top priority. Otherwise, if you get electrocuted during the disassembly process, it will be more trouble than gain.
Therefore, make sure that the power supply is completely disconnected so that you can feel at ease.
Next, you need to fix the display screen. Think about it, if the display screen shakes when disassembling, it is not only easy to damage, but also may hurt yourself. So, find a stable place and use tools to firmly fix the display screen, so that we can remove the module with confidence.
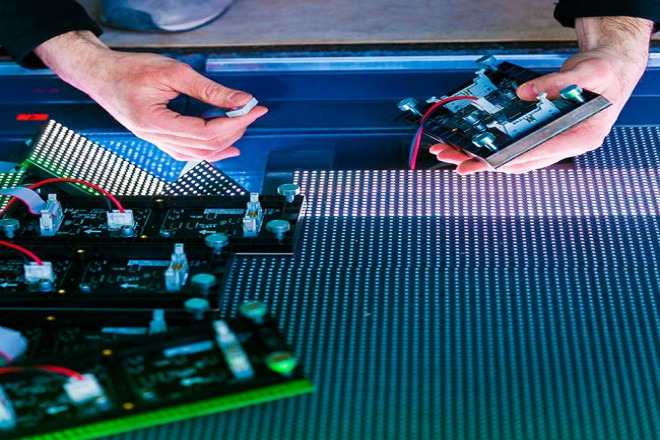
2). Remove the module
First, you need to find the screws that fix the module and then loosen them one by one with a screwdriver. Be careful not to lose the screws. Otherwise, it will be troublesome when installing.
After the screws are loosened, we can start to remove the module.
Some modules may be easily removed with a board remover, while others may have to be carefully broken off manually. No matter which method, you must pay attention to the strength. Don’t be too strong. Otherwise, it will be bad if the module or other parts of the display screen are damaged.
During the disassembly process, you must always protect the module and the display screen, just like treating your own baby. Don’t let them get scratched or damaged.
3). Deal with the connecting wires
After the module is removed, you still have to deal with those connecting wires. The power cord, cable, etc., all need to be disconnected one by one. But before disconnecting, you must remember to turn on the recorder and record the order and position of the connection cables.
Why? You have to connect them back to the original order and position during the subsequent installation; otherwise, it will be troublesome if you connect them wrong.
Be careful when disconnecting the connection cables. Don’t pull them hard; otherwise, it will be more trouble than it’s worth if you break the cables. Disconnect them gently and slowly to ensure that the connection cables are intact.
In short, although the process of disassembling the module looks simple, there are actually many details that need to be paid attention to.
Cut off the power, fix, disassemble the module, and handle the connection cables. Each step must be carried out carefully. Only in this way can we ensure that the disassembly process goes smoothly and that the module and display can be preserved intact.
1). Prepare the new module
Before installing the new module, you have to do a careful inspection. Check whether the new module is intact, whether the appearance of the lamp beads is normal, and whether there are any damaged or missing ones.
This can’t be sloppy; otherwise, it will be troublesome if you encounter problems after installation.
After checking, you should prepare the corresponding new module according to the module model and quantity determined during the previous disassembly. Don’t make a mistake; otherwise, it will be a waste of effort if it doesn’t match when installed.
2). Connect the new module
Remember the order and position of the connection wires recorded during the previous disassembly? Now, it comes in handy!
According to that order and position, the connection wires of the new module are connected to the display screen correctly one by one. Don’t connect them wrongly; otherwise, the display effect will be wrong.
After the connection is completed, we still have to use tools (such as screwdrivers) to fix the new module. Make sure it is installed firmly and doesn’t shake. Otherwise, the module falls off or loosens during use, which is not good.
3). Preliminary test
After the new module is installed, you have to do a preliminary test to see if it works properly. How to test it? You can use a test card to send a simple test image or text to the display screen, and then carefully observe the display effect.
Check if the image is clear, the text is complete, and the colour is normal. If everything is normal, it means that the new module has been installed successfully! If there is any problem, you must quickly check where the problem is and fix it in time.
In short, although the installation steps of the new module are not difficult, you also need to be careful and patient.
Prepare the new module, connect the new module, and conduct preliminary tests. Every step can not be sloppy. Only in this way can we ensure that the new module is installed successfully and the display screen resumes normal operation.
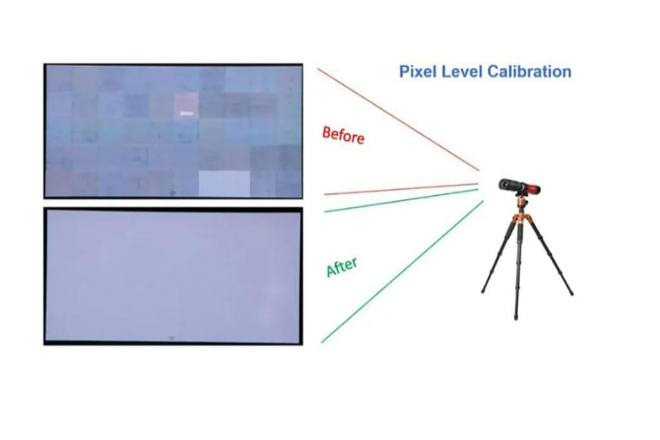
1). Screen display effect debugging
After the new module is installed, you have to debug the display effect of the screen. The brightness and contrast of the display screen must be adjusted according to the actual situation. Too bright is dazzling, too dark is not clear, so it has to be adjusted to just right.
In addition, if conditions permit, we can also use professional software to perform colour correction and uniformity adjustment on the display screen. In this way, the colour of the display screen will be more accurate, the picture will be more uniform, and it will look more comfortable.
2). Light source calibration
If this replacement involves the backlight module, then the light source calibration must not be forgotten. When calibrating, we have to pay attention to the brightness, uniformity and color temperature of the backlight module.
The brightness should be moderate, the uniformity should be good, and the color temperature should be adjusted to the most appropriate state. In this way, the display effect of the display will be more outstanding.

1). Static electricity protection
Static electricity is an invisible killer, and it may cause damage to the display screen if you are not careful. Therefore, in the process of replacing the module, we must take good static electricity protection measures.
For example, wearing an anti-static wristband and anti-static gloves can effectively prevent the generation and accumulation of static electricity.
When disassembling and installing the module, you must also be particularly careful to avoid static electricity. For example, do not touch the internal components of the display directly with your hands, and do not rub the display screen with plastic tools. These may generate static electricity and damage the display screen.
2). Avoid working with electricity
This is particularly dangerous! It is strictly forbidden to disassemble and install the module when the power is on. Why? Because when the power is on, the current will flow back and forth. If we accidentally touch something, or the tool accidentally touches something, it will be troublesome.
At the least, the module will be damaged, and at the worst, it may cause electric shock and injury. Therefore, before replacing the module, be sure to cut off the power supply. After the operation is completed, you must also confirm that it is correct before turning on the power supply to ensure safety.
3). Professional operation:
The last point, which is also very important, is that for some complex display screens or module replacement operations, we still recommend seeking the help of professionals. After all, professional things still need professionals to do. If non-professionals disassemble and replace modules at will, it is likely to cause unnecessary losses due to unfamiliarity with the operating procedures or lack of professional knowledge. Therefore, for the sake of insurance, it is better to find professionals to help!
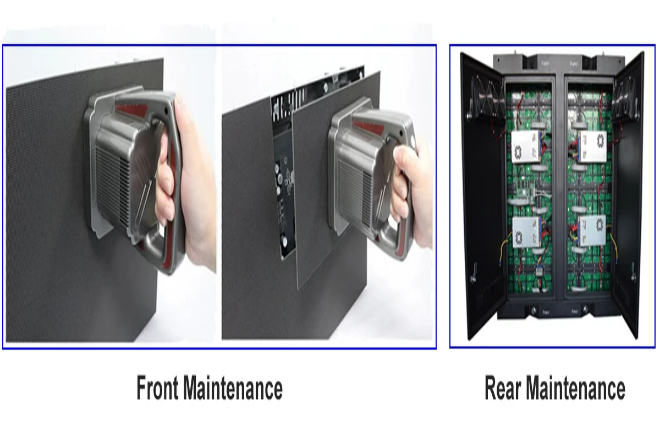
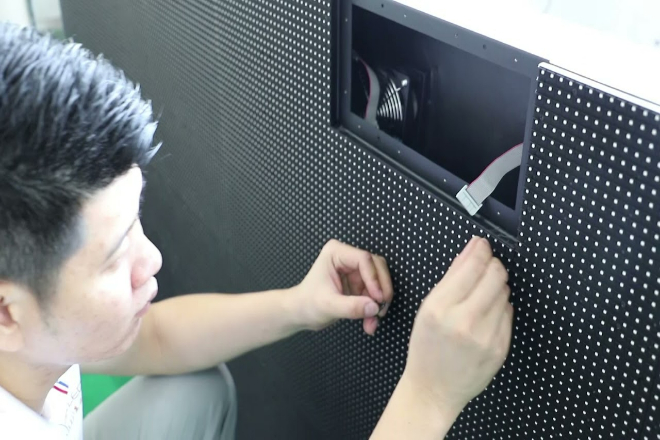
1). Front maintenance module replacement:
Front maintenance means replacing the module directly from the front of the screen. This method is particularly suitable for places with small spaces, such as indoor and wall-mounted displays. The technician can do it standing in front without running to the back, which is trouble-free and convenient.
Moreover, the display screen with front maintenance is made thinner, looks more beautiful, and matches the surrounding environment better. However, because the design is more complicated, the price may be slightly higher. In addition, in order to dissipate heat well, you may have to add some additional heat dissipation equipment.
2). Rear maintenance module replacement:
Rear maintenance means replacing the module from the back of the screen. This method is more commonly used on large outdoor displays, such as on roofs and pillars. Because there is enough space at the back, it is also very convenient to maintain.
The price of rear maintenance display screens is relatively cheaper and more affordable. However, if the space where the display screen is installed is not large, it may be a bit troublesome to maintain it, and you may have to dismantle other things to replace the module.
In general, front maintenance and back maintenance each have their own advantages. Which one to choose depends on your specific situation, such as the installation environment, budget, etc. Only by choosing the right one can the display screen be used better and longer.