Introduction
As an important tool for modern event display, LED rental screens are widely favored for their high definition, high brightness, and flexible construction methods. However, correct installation and debugging are the keys to ensuring the normal operation of the LED rental screen, and they are also important links to ensure the smooth progress of the event.
This article will explain the installation process of LED rental screens in depth so that you can quickly install an LED rental screen.
1. Preparation before installation
- First is the site survey:
Before installing the LED rental screen, we must conduct a detailed survey of the installation site. This step of work is not only to understand the overall environment of the site but also to accurately grasp the size and load-bearing conditions of the site.
During the investigation process, we need to carefully observe the topography, spatial layout, and surrounding facilities of the site to ensure that the installation of the LED rental screen will not be interfered with by any obstacles.
At the same time, by measuring the size of the venue, we can make reasonable layout planning based on the actual size of the LED rental screen to ensure that the screen can be perfectly integrated into the venue environment. In addition, it is crucial to understand the load-bearing situation.
We need to check the site structure diagram or conduct on-site load-bearing tests to ensure that the built support structure can firmly support the weight of the entire LED rental screen to prevent safety hazards caused by insufficient load-bearing.
- Next is equipment inspection:
Equipment inspection is an integral part of pre-installation preparation. Before installing the LED rental screen, we must conduct a comprehensive and detailed inspection of all equipment to ensure its integrity. This includes core components such as display screens, power supplies, and control systems of LED rental screens, as well as accessories such as brackets and connectors.
We need to carefully check whether each component is complete and whether it is damaged or missing to ensure that the installation will not be interrupted due to equipment problems during the installation process.
In addition, we also need to test the performance of the equipment, including the display effect of the display, the power supply capacity of the power supply, the stability of the control system, etc., to ensure that the equipment can operate normally during installation and achieve the expected display effect.
- Finally, tool preparation:
Installing an LED rental screen requires the use of a variety of professional tools. Therefore, preparing all the required installation tools is an important part of preparation before installation.
According to the installation requirements of the LED rental screen and the actual situation of the site, we need to prepare basic hand tools such as screwdrivers, wrenches, and electric drills, as well as auxiliary tools such as measuring tools and safety protection supplies.
The selection and use of these tools will directly affect the quality and efficiency of installation. Therefore, when preparing tools, we need to fully consider the suitability, durability, and safety of the tools to ensure that the selected tools can meet the installation needs and remain in good working condition during use.
2. Installation method
1). Hoisting:
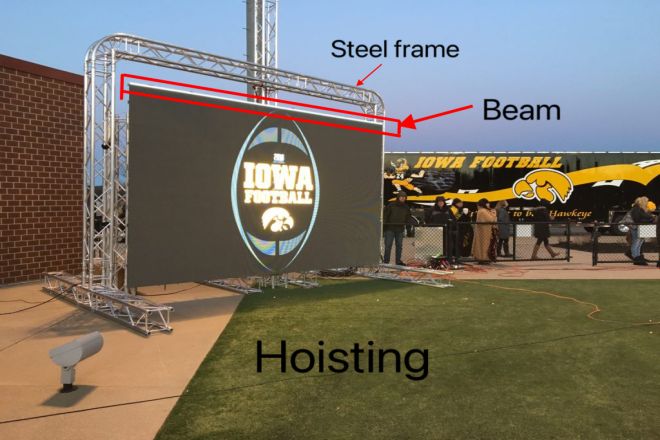
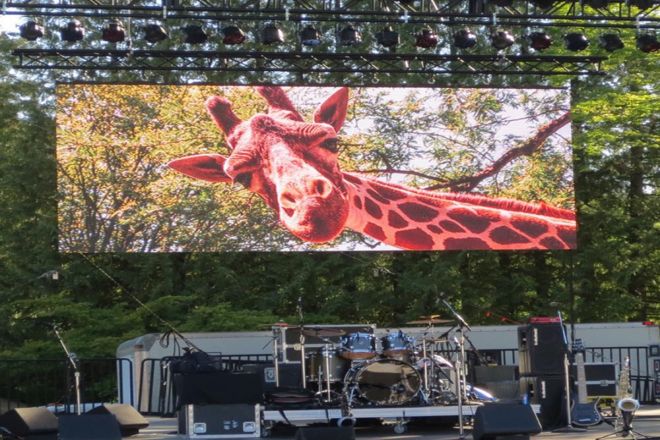
As a professional method of installing LED rental screens, hoisting is especially suitable for large outdoor venues, such as stadiums and open-air concerts. By hanging the screen box on the steel frame structure, it realizes the high-altitude hanging display of the screen, bringing shocking visual effects to the audience.
- Step 1: Detailed site survey and measurement work is required.
This includes checking the site’s dimensions, height restrictions, and obstructions to determine the best lifting solution and steel structure layout. At the same time, the performance and load-bearing capacity of the hoisting equipment also need to be evaluated to ensure the safety and reliability of the hoisting process.
- Step 2: Installation of steel frame structure.
According to the actual conditions of the site and the lifting plan, select appropriate steel frame materials and specifications and conduct precise measurements and cutting. During the installation process, it is necessary to ensure the stability and firmness of the steel frame structure.
Each steel column and beam needs to be adjusted vertically and horizontally according to the design requirements and fixedly connected using high-strength bolts or welding.
- Step 3: Splicing and lifting.
After the steel frame structure is installed, the LED rental screen box can be spliced and hoisted. During the splicing process, each box needs to be accurately spliced together in a preset order and position to ensure the flatness of the entire screen and the uniformity of the splicing.
At the same time, the joints of the boxes also need to be sealed to prevent the intrusion of dust and moisture.
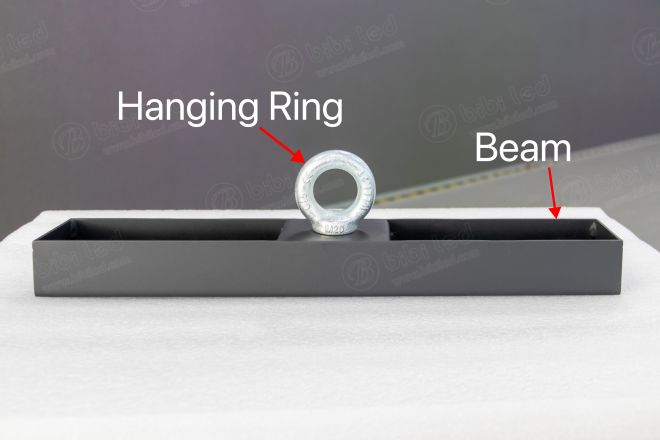
When lifting, you need to use professional lifting equipment and tools, such as lifting rigging, pulleys, etc. First, pass the steel cable through the steel ring on the lifting beam and connect it to the lifting equipment.
Then, through the operation of hoisting equipment, the screen box is slowly lifted to the predetermined position and accurately adjusted. During the hoisting process, you need to pay close attention to the stability and safety of the screen to ensure that there will be no shaking or tilting.
- Step 4: Check the pretest.
After the hoisting is completed, the entire hoisting structure needs to be carefully inspected and tested. Check whether the connection between the steel frame structure and the lifting equipment is firm, whether the screen is stable and without shaking, and whether the connection of the power cord and signal cable is reliable.
At the same time, it is also necessary to perform a lighting test on the screen to check whether the display effect is normal and whether there are faults or hidden dangers.
The hoisting method is not only suitable for large outdoor venues but is also widely used in various temporary display areas. It can flexibly adjust the position and angle of the screen according to the actual conditions and needs of the venue, bringing the best viewing experience to the audience.
However, hoisting methods also require special attention to safety issues. During the hoisting process, safe operating procedures must be strictly followed to ensure the personal safety of workers and the integrity of equipment.
2). Floor-standing:
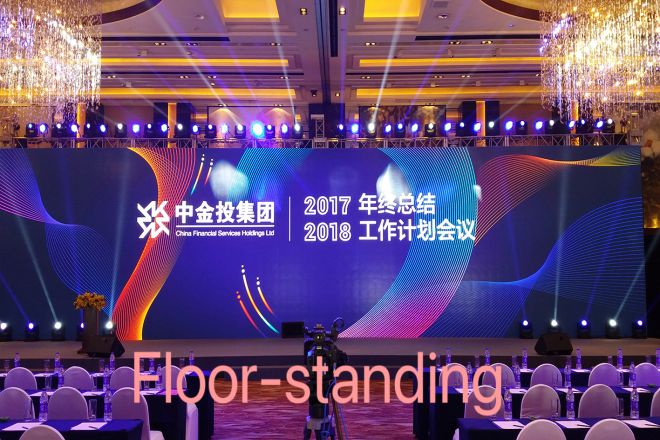
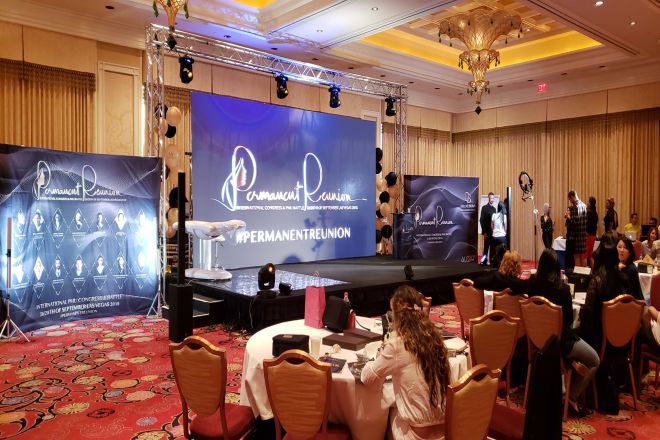
Floor-standing installation is a classic installation method for LED rental screens, especially suitable for indoor or relatively flat outdoor venues. It has won the favor of many users for its stability, reliability, and easy installation.
Before proceeding with floor-standing installation, a detailed survey and assessment of the site is first required. This includes checking the floor for smoothness, load-bearing capacity, and potential obstructions. According to the actual conditions of the site, formulate an appropriate installation plan and prepare corresponding installation tools and materials.
- Step 1: Level the site.
Clear clutter and obstacles on the ground to ensure it is clean and tidy. If the ground is uneven, filling and leveling work is necessary to ensure the stability of the installation base.
- Step 2: According to the size and weight of the LED rental screen, select the appropriate base and bracket for installation.
As the key part that supports the entire screen, the base needs to choose products with reliable quality and strong load-bearing capacity. The selection of the bracket should also take into account factors such as the height and angle of the screen to meet viewing needs.
When installing the base and bracket, you need to strictly follow the installation instructions and specifications. First, place the base on the ground according to the preset position and use a spirit level to make horizontal adjustments to ensure that the base is stable and without shaking.
Then, use bolts or welding to securely connect the base and the bracket to ensure a solid and reliable connection.
After completing the installation of the base and bracket, the LED rental screen box can be fixed on the bracket. When fixing, special fixings or bolts need to be used to tightly connect the box and the bracket.
During the fixing process, it is necessary to ensure that each box is installed smoothly and firmly and that the connections are seamless to ensure the screen’s display effect and safety of use.
- Step 3: Check and adjust.
After the fixation is completed, the entire installation structure needs to be inspected and adjusted. Check whether the base and bracket are firmly installed, whether the connections are loose, and whether the screen is flat and not warped.
At the same time, the angle and height of the screen can be appropriately adjusted according to usage needs and environmental factors to achieve the best viewing effect.
In addition, the floor-standing installation method also needs to consider the connection issues of the power supply and signal lines. During the installation process, enough space needs to be reserved to facilitate access to power lines and signal lines.
At the same time, you also need to pay attention to the protection of power lines and signal lines to avoid external interference or damage.
The floor-standing installation method is not only suitable for indoor places, such as exhibition halls, conference rooms, etc., but also for flat outdoor venues, such as squares, parks, etc.
It can provide users with stable and reliable visual display effects to meet the needs of activities and venues of all sizes.
3. Things to note when installing LED rental screens are as follows
- Safety protection:
Safety is always the primary consideration. During the installation process, all workers must wear protective equipment such as safety helmets and gloves to ensure their own safety. Especially when working at heights or operating heavy equipment, safety operating procedures should be strictly followed to prevent accidents.
- Waterproof and dustproof:
LED rental screens are very sensitive to the intrusion of water and dust into electronic devices. During the installation process, ensure that the working environment is dry and clean to prevent water, dust, and other contaminants from entering the inside of the screen.
If the environment at the installation site is harsh, it is recommended to take necessary protective measures, such as building a temporary dustproof shed or using a tarpaulin for shielding.
- Splicing accuracy:
LED rental screens are usually spliced together from multiple modules, and special attention needs to be paid to maintaining the splicing accuracy between screens during installation. If the splicing is not accurate, it may cause problems such as misalignment and breakage in the picture, affecting the overall display effect.
Therefore, during the installation process, professional tools should be used for precise measurement and positioning to ensure that the gaps between each module are even and flat.
- Regular inspections:
Once the installation is complete, it does not mean that it is set and forgotten. LED rental screens may be affected by various factors during use, such as temperature changes, humidity changes, vibration, etc., which may cause screen performance to decline or malfunction.
Therefore, it is recommended that the LED rental screen be regularly inspected and maintained, including checking whether the connecting lines are loose, cleaning dust and dirt, and adjusting parameters such as brightness and color to ensure its normal operation and maintain good display effects.
4. What subsequent maintenance needs to be done?
Subsequent maintenance of LED rental screens requires a series of measures to ensure their normal operation and extend their service life. Here are some key maintenance steps and considerations:
- Regular cleaning:
Clean the screen regularly to remove dust and other dirt and maintain its good display effect. When cleaning, you should use a soft dry cloth or a professional cleaning cloth, and avoid using chemical cleaners or water to clean the screen directly to avoid damage to the screen.
- Check connections:
Regularly check that all power and signal cable connections are secure to ensure the screen is working properly. If loose or damaged connections are found, they should be repaired or replaced promptly.
- Adjust brightness and color:
According to the environment and usage needs, adjust the brightness and color settings of the screen in a timely manner to obtain the best display effect. At the same time, avoid using too high or too low brightness for a long time to avoid damage to the screen.
- Heat dissipation management:
Ensure that the screen has good heat dissipation conditions to avoid overheating caused by the long-term high-load operation. The cooling vents and fans can be cleaned regularly to ensure they are unobstructed.
- Software Updates:
Regularly update screen control software and related drivers to fix possible vulnerabilities and improve performance.
- Back-up data:
The backup screen displays content and sets data regularly to prevent data loss due to unexpected circumstances.
- Professional training:
Provide professional training to maintenance personnel to understand the structure, working principles, and maintenance methods of LED rental screens to ensure that maintenance work can be carried out correctly and effectively.
In addition, you need to pay attention to the following points:
Avoid using devices with strong magnetic fields near the screen to prevent them from interfering with the normal working of the screen.
During transportation and storage, ensure that the screen is not affected by external forces such as extrusion and impact to prevent damage.
When using the screen, avoid displaying the same screen for a long time to prevent pixel aging and damage.
In short, subsequent maintenance of LED rental screens requires careful consideration of many aspects, including cleaning, connection inspection, adjustment of settings, heat dissipation management, software updates, etc. Only by doing these maintenance tasks can we ensure the normal operation of the screen and extend its service life.
Conclusion
Through the study of this tutorial, we have an in-depth understanding of the installation process of LED rental screens.
From preliminary preparation to actual installation to later debugging and testing, every step is crucial. Correct installation can not only ensure the normal operation of the LED rental screen but also improve the overall effect of the event and bring a better visual experience to the audience.
During the actual installation process, you need to pay special attention to safety issues to ensure the safety of personnel and equipment. At the same time, maintaining the splicing accuracy between screens and taking waterproof and dustproof measures are also important aspects to ensure the quality of the installation.
If you would like to know more about LED rental screens, please get in touch with us.
